07. March 2020
Adding a iOS test user to AppCenter
I was having some trouble with getting my iOS testers up and running so I decided to create my own instructions and share them with you. On Android this is much easier and your users (and you) don’t need to jump through so many hoops!
Not at the testers stage yet?
If you are just starting your journey of Apple certificates and provisioning profiles and the notion of testers is still far away I would recommend that you look at Nicks Randolph’s awesome instructions iOS - Build (scroll down to the part that contains all the certificate creation stuff). I also reccommend that you follow his yaml pipeline setup there and at pipelinetemplates.com for ultimate success :-)
But I had done all that and have a functioning app that I need to get into the hands of my testers.
The default docs on registerin iOS testers
The Device registration docs on this are just terribly complex and contain way to much stuff and way to few images! Maybe there are better once in there but I this is what I found.
I also found this short explanation How do I add an iOS device for testing? at the Appcenter advice and answers but it didn’t really help my testers.
I tried to send my testers the instructions but they weren’t enough because they stopped to soon with no details what would happen on the phone side.
I had to try it out on my other device to find out all the steps I needed to go through and document it.
So do I think I can do a better job?
Yes I think so! Just with more images (and hope that DevOps doesn’t change that much) I will at least try. So here goes…
Steps for testers
Here are the steps that the testers need to follow to install.
Step 1: Accept your AppCenter invitation
As a tester you will get an invitation to AppCenter in your email inbox. Accept that email and follow the instructions on that. Log in with your preferred credentials.
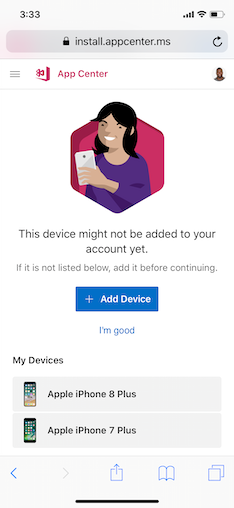
Step 2: Click Add Device
You should see this screen where you need to click the Add Divice button
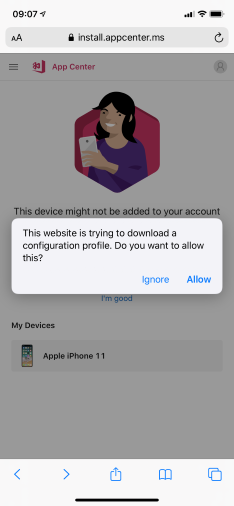
you should see the following screen pop up
Step 3: Download a configuration profile
Click Allow and get “Profile Downloaded”
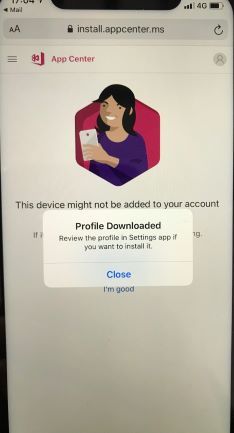
Step 4: Install the downloaded profile
Now you need to go to Settings -> General and scroll down until you see Profiles & Device Management and click it. If you don´t see this in your list you didn’t manage to dowonload and install the profile. You should re-try from step 2.
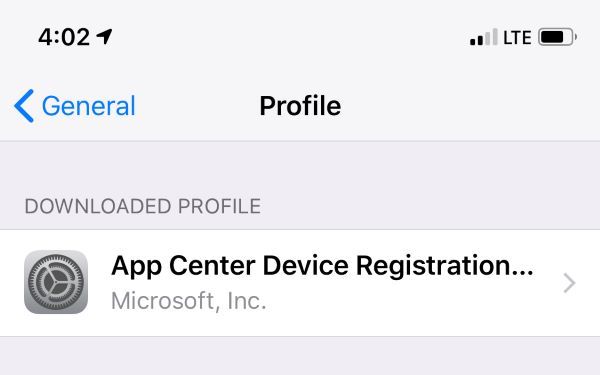
clicking the App Center profile here above will give you the following
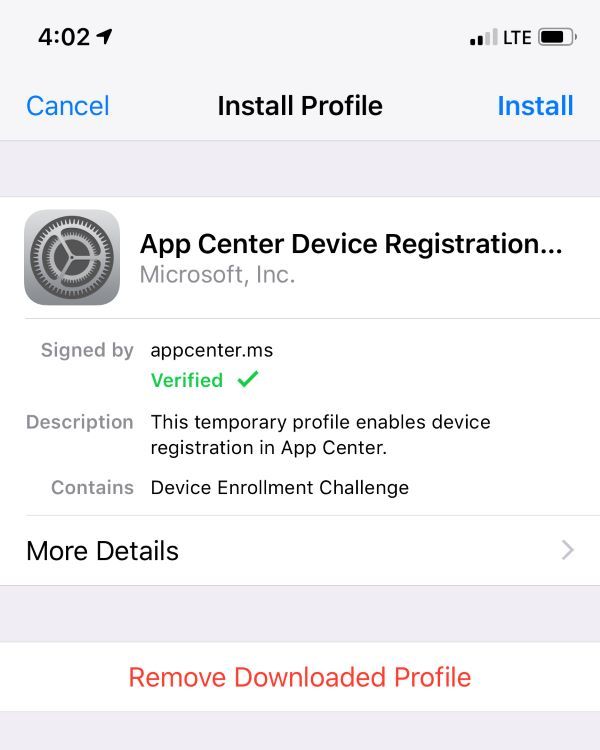
Click Install and get this when you go back to your app install email
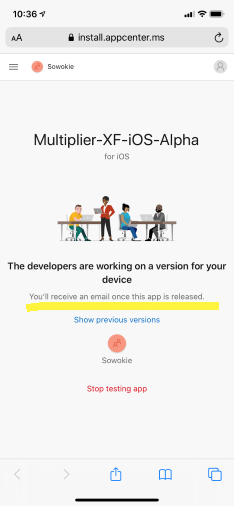
Step 5: Now you WAIT for the app developer
As a tester you will have to wait until the developer imports your device information into AppCenter/Apple developer portal and gets back to you.
As a tester you can stop reading and just wait patiently after your next new version has arrived email!
Steps for the app developer
Here are the steps the developer of the app needs to go through so the new tester can install the app.
Navigate to your app Distribute > Groups > Select the Group > Devices
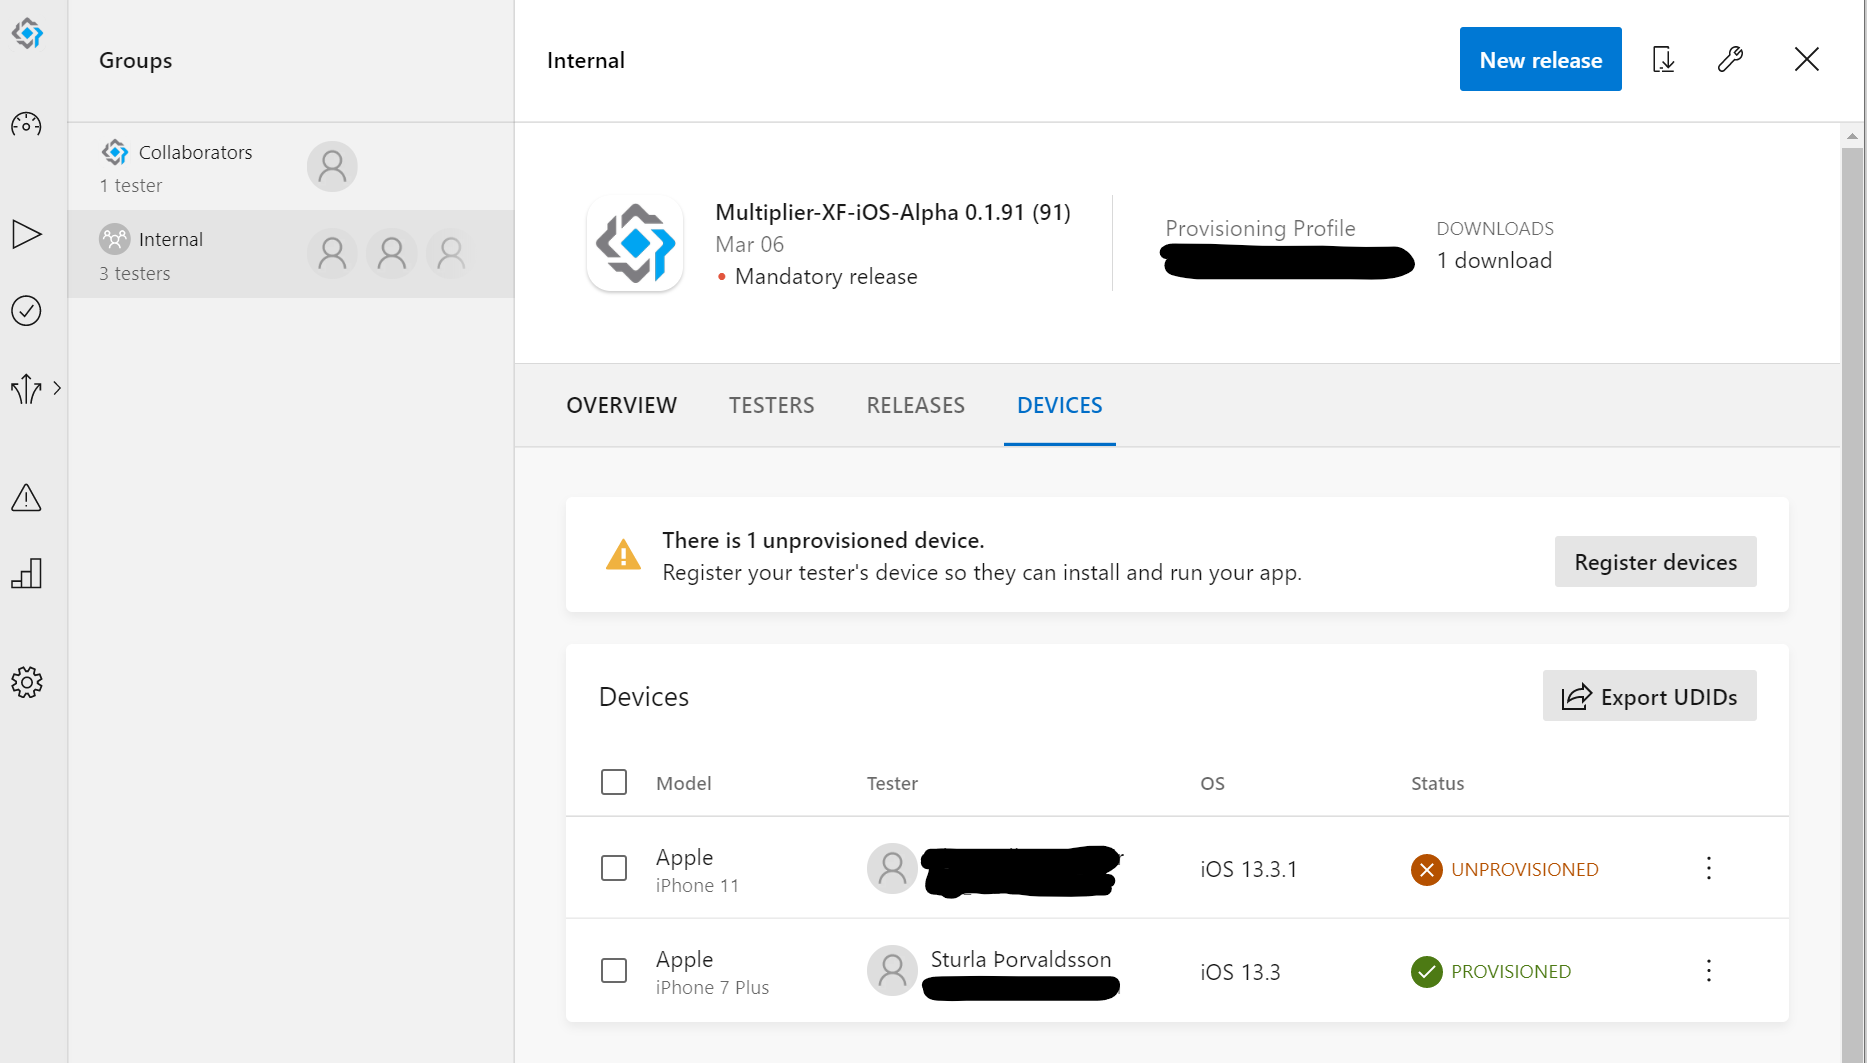
click “Register devices”
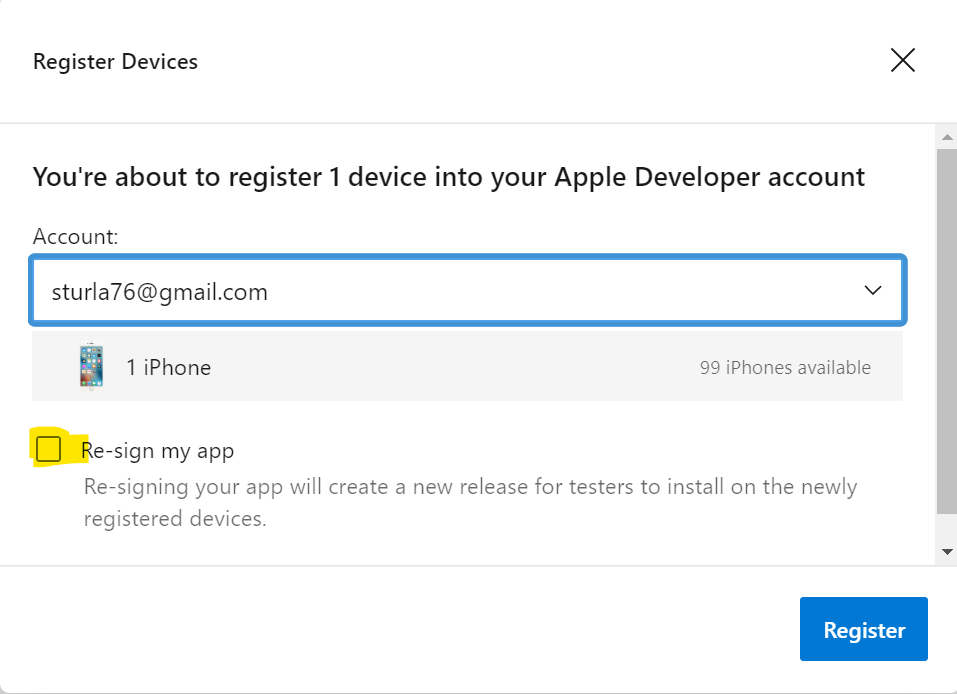
check the “Re-sign my app” checkbox and then click Register
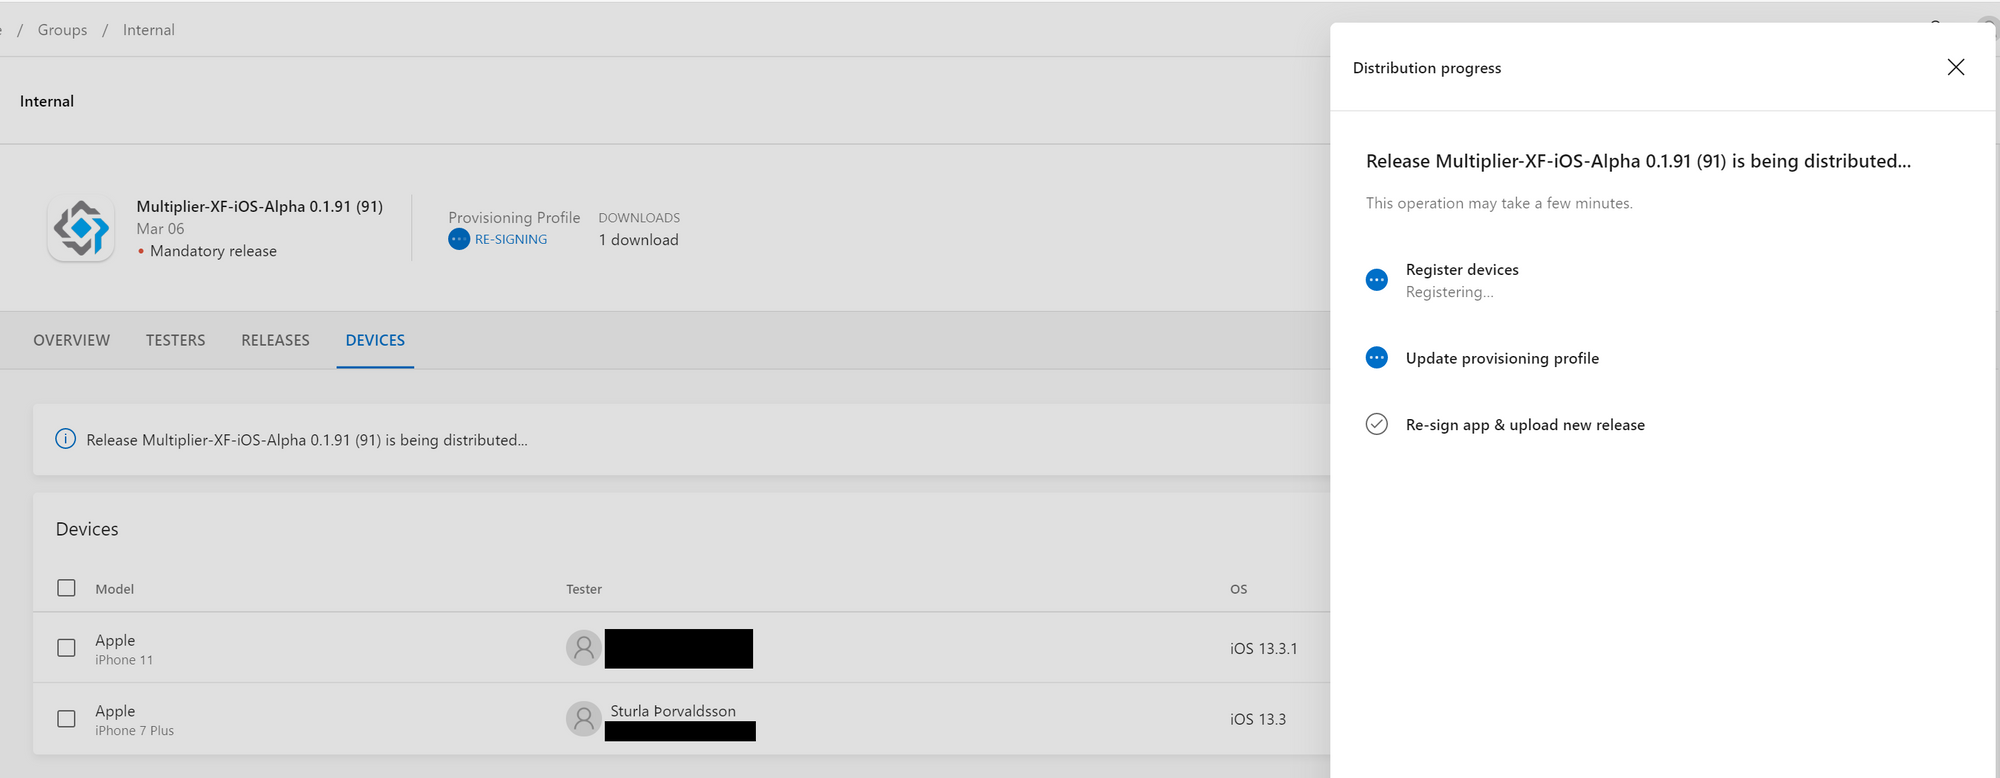
now your new iOS test user has been uploaded to your provisioning profile at Apple and will be able to download and test your app.
But I’m using yaml build pipelines
But if you are using pipeline_templates like me you will have to update your provisioning profile in DevOps with the new one from Apple.
- Download your provisioning profile at developer.apple.com
- Go to Azure DevOps -> Pipelines -> Library and delete your current mobileprovision file Secure files
- Upload the new provisioning profile you just downloaded from apple.
- Run your pipeline to distribute your app to your users.
- You will need to give permissions to the provisioning profile (its shown in the UI)
I hope this explains everything you need to do to get this working.
